Setting up PostgreSQL on Kubernetes with CNPG
Published on: September 28, 2025
18 min read
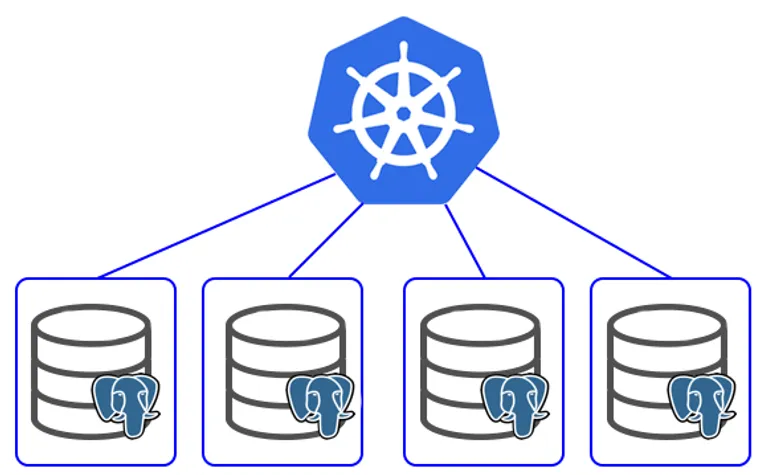
Table of Contents
Setting up PostgreSQL on Kubernetes with CNPG
I’ll write down the process of setting up PostgreSQL on Kubernetes with some common configurations and optimizations. This guide assumes you have a basic understanding of Kubernetes and have a cluster set up. I’ll start with a simple setup and then add more configurations as we go along.
To set up PostgreSQL on Kubernetes, we will use CNPG (Cloud Native PostgreSQL Operator), which is a popular operator for managing PostgreSQL clusters on Kubernetes. It handles tasks like backups, failover, and scaling conveniently.
1. Install CNPG Operator
First, we need to install the CNPG operator in our Kubernetes cluster. You can do this using Helm or by applying the operator’s manifest directly. Using Helm for easier management:
helm repo add cnpg https://cloudnative-pg.github.io/chartshelm upgrade --install cnpg \ --namespace cnpg-system \ --create-namespace \ cnpg/cloudnative-pgThis command adds the CNPG Helm repository and installs the operator in the cnpg-system namespace. This operator will manage our PostgreSQL clusters.
2. Create a PostgreSQL Cluster
According to CNPG recommended practices, we should have a cluster for each application/environment in separate namespaces. Let’s say we have a namespace called myapp for our application, and we want to create a PostgreSQL cluster for it. First, we need to create the secret for the database user:
apiVersion: v1kind: Secretmetadata: name: db-secret namespace: myapptype: kubernetes.io/basic-authstringData: username: app password: "your-strong-password"After creating the secret, we can create the PostgreSQL cluster using a manifest like this:
apiVersion: postgresql.cnpg.io/v1kind: Clustermetadata:  name: cnpg-cluster-1  namespace: myappspec:  instances: <number-of-instances>
  storage:    size: <your-storage-size>    storageClass: <your-storage-class>
  bootstrap:    initdb:      database: app      owner: app      secret:        name: db-secret
This will create a cluster with a database called ‘app’ and the owner ‘app’ using the credentials from the secret we created earlier. These will be the credentials for connecting to the database. By default, the manager user is postgres with a random password generated by CNPG - it is used for managing the cluster and should not be used for application connections.
For high availability, you should have at least 2 instances for master-replica setup, and by default CNPG will take care of failover and replication for you. The default setting uses asynchronous replication, which has better performance, but you can change it to synchronous if you need stronger consistency. You should read more about it in the CNPG documentation: https://cloudnative-pg.io/documentation/current/replication/
Now, an important part is the storage. For on-premises clusters, you can use fast local SSD storage with much higher IOPS and lower latency than network storage. This is acceptable since we have replication and backups. For local storage class, if you are using replicated storage, most of them have quorum-based writes, so you will have minimum 2x3 (replica x quorum) copies of your data and can cause write amplification and slow down. If you are using cloud, just replace the class with your cloud provider’s block storage class.
For this example, we can use OpenEBS local storage class, which is a popular choice for on-premises clusters. You can install OpenEBS using Helm and use any of the local volume classes for local storage. You can find the installation instructions at: https://openebs.io/docs. You can use hostpath, but OpenEBS can take advantage of features like LVM snapshots, backups, etc. For this example, we will skip the advanced configurations for simplicity.
You should make sure the configuration uses retain policy. Here is a safer storage class configuration than the default:
apiVersion: storage.k8s.io/v1kind: StorageClassmetadata: name: hostpath-retain annotations: cas.openebs.io/config: | - name: StorageType value: "hostpath" - name: BasePath value: "/var/openebs/local" openebs.io/cas-type: local storageclass.kubernetes.io/is-default-class: "true"provisioner: openebs.io/localreclaimPolicy: Retain # will not delete the data when PVC is deleted, you can do normal postgres stuff from the node:var/lib/openebs/local/<pvc-uid>/pgdata just in casevolumeBindingMode: WaitForFirstConsumerallowVolumeExpansion: trueThis storage class will create local volumes on the node where the pod is scheduled, and it will retain the data even if the pod is deleted. In theory, CNPG should take care of recreating the pod on another node if the node goes down, but it is safer to have a retain policy.
You can apply the YAML files for storage class, secret, and cluster using:
kubectl apply -f storage-class.yamlkubectl apply -f secret.yamlkubectl apply -f cluster.yamlWait for the pods to be in running state. You can check the status of the cluster using:
kubectl get pods -n myappYou should see cnpg-cluster-1-n pods, where n is the number of instances you specified.
3. Accessing the Database
CNPG will create 3 services for the cluster: cnpg-cluster-1-rw, cnpg-cluster-1-ro, and cnpg-cluster-1-r.
- The
rwservice is for read-write connections and always points to the primary instance - The
rservice includes both primary and replicas, load balancing read requests among them - The
roservice is for read-only connections and only points to the replicas
If you have multiple instances, it makes more sense to use the ro service for read queries.
From your application, if in the same namespace, you can connect to the database using the service name as the host, and the port is 5432 by default. The connection string format:
postgresql://app:your-strong-password@cnpg-cluster-1-rw.myapp.svc.cluster.local:5432/appNow you have a basic PostgreSQL cluster running on Kubernetes with CNPG, and you can connect to it from your application.
Let’s add some common scenarios and configurations.
4. Scheduling Pods on Specific Nodes
You can use node selectors or affinity rules to schedule the PostgreSQL pods on specific nodes. This is useful if you have nodes with specific hardware or storage configurations. For production workloads, especially monolithic applications or critical services, you should consider running PostgreSQL on dedicated nodes to ensure consistent performance and avoid resource contention.
When setting resource limits, it’s recommended to set requests equal to limits for database workloads. This ensures the pod gets guaranteed QoS class, giving it priority in scheduling and preventing eviction during resource pressure.
Here is an example of using node affinity to schedule the pods on nodes with a specific label:
apiVersion: postgresql.cnpg.io/v1kind: Clustermetadata:  name: cnpg-cluster  namespace: cn-postgresspec:  instances: <number-of-instances>  # 2 minimum for HA , 3 also good (master, read-replica, standby-replica)
  # Resource limits - for priority scheduling, set requests = limits  resources:    requests:      memory: "200Gi"      cpu: "98000m"    limits:      memory: "200Gi"      cpu: "98000m"
  affinity:    nodeSelector:      cnpg: "true"
This will schedule the pods on nodes with the label cnpg=true. You can also use more complex affinity rules if needed, you can read the documentation for more details: https://cloudnative-pg.io/documentation/current/scheduling/.
You can label the nodes using:
kubectl label nodes <node-name> cnpg=true5. Backups
For backups, use cloud storage like S3 - don’t skip this part as it’s very important to have backups in case of data loss or corruption. Don’t think replication is backup - it’s not. Replication is for high availability and load balancing, but if you delete data or it gets corrupted, it will replicate the changes to all replicas. You need backups to restore from a point in time. Don’t self-host your backups - use cloud storage like S3, GCS, etc.
For backups you should use the barman plugin provided by CNPG. The documentation is at: https://cloudnative-pg.io/plugin-barman-cloud/docs/installation/. You can install it using their manifest:
kubectl apply -f \https://github.com/cloudnative-pg/plugin-barman-cloud/releases/download/v0.7.0/manifest.yamlYou should also read this section of the CNPG documentation: https://cloudnative-pg.io/documentation/current/recovery/
This will install in the cnpg-system namespace. If you have installed the operator in another namespace, you should download the manifest and change the namespace before applying.
Now we need to create an Object Store, which is a custom resource provided by the plugin to configure the connection to the cloud storage. Here is an example configuration for S3, along with S3 secret:
# Secret for S3 credentialsapiVersion: v1kind: Secretmetadata: name: "s3-credentials-01" namespace: myapp labels: cnpg.io/reload: "true"type: Opaquedata: ACCESS_KEY_ID: "" ACCESS_SECRET_KEY: ""---apiVersion: barmancloud.cnpg.io/v1kind: ObjectStoremetadata: name: s3-object-store-01 namespace: myappspec: configuration: destinationPath: "your-s3-bucket-name" # if using AWS S3, put bucket name endpointURL: "https://s3.amazonaws.com" # if using AWS S3, use S3 endpoint s3Credentials: accessKeyId: name: s3-credentials-01 key: ACCESS_KEY_ID secretAccessKey: name: s3-credentials-01 key: ACCESS_SECRET_KEY wal: compression: gzip maxParallel: 4 tags: cluster: "cnpg-cluster-1" environment: "prod|dev|staging" backup-type: "automated" retentionPolicy: "30d" # keep backups for 30 days, also determines how long WAL files are kept for point-in-time recoveryThis will configure the bucket to store the backups, and the retention policy to keep the backups for 30 days. Later you can do point-in-time recovery using the backups, as the backups are base backups and WAL files.
There’s a configuration for encryption as well if you need it - please check the documentation for more details. For me it was causing a backup issue with AES256, and the backup was not uploading. A private bucket will be sufficient for most use cases, and you can enable server-side encryption on the bucket itself.
Now we need to configure the cluster to use the object store for backups. We can do this by adding the following configuration to the cluster manifest:
apiVersion: postgresql.cnpg.io/v1kind: Clustermetadata:  name: cnpg-cluster-1  namespace: myappspec:  #... other configurations ...
  plugins:  - name: barman-cloud.cloudnative-pg.io    isWALArchiver: true    parameters:      barmanObjectName: s3-object-store-01
This will enable the barman plugin and configure it to use the object store we created earlier. Now the cluster will automatically take backups and store them in the configured S3 bucket. This is WAL archiving, so it will be continuous backups, allowing you to do point-in-time recovery.
First you need to create a backup object to take the first base backup, as the automatic backups will only take WAL files. You can create a backup object like this:
apiVersion: postgresql.cnpg.io/v1kind: ScheduledBackupmetadata: name: cnpg-cluster-weekly-backup namespace: myapp labels: app: postgres backup: weeklyspec: schedule: "0 0 2 * * 0" # 2 AM UTC on Sundays (adjust as needed) immediate: true # Run immediately upon creation backupOwnerReference: self # Owner sets backups to this resource, so they are deleted when this is deleted, but not the cluster cluster: name: cnpg-cluster-1 method: plugin pluginConfiguration: name: barman-cloud.cloudnative-pg.ioThis will create a scheduled backup that runs every Sunday at 2 AM UTC, and it will also run immediately when created. You can adjust the schedule as needed. The first backup will take some time as it is a base backup, but subsequent backups will be faster as they are only WAL files.
You can also create instant backups by creating a manifest of kind Backup and applying it, like this:
apiVersion: postgresql.cnpg.io/v1kind: Backupmetadata: name: cnpg-cluster-instant-backup namespace: myappspec: cluster: name: cnpg-cluster-1 method: plugin pluginConfiguration: name: barman-cloud.cloudnative-pg.ioYou can check the status of the backups using:
kubectl get backups -n myappor for scheduled backups:
kubectl get scheduledbackups -n myappand you can describe the backup to see the details and status of each backup in more detail.
Restoring from Backups
To restore from a backup, the way is to bootstrap a new cluster from the backup.
Caution: Make sure you are not pushing back to the same bucket as it will overwrite the existing backups. I would recommend not configuring the backup section initially when creating the new cluster, and after the cluster is up and running, then configure the backup section to avoid any accidental overwrites.
Here is an example manifest to create a new cluster from a backup:
apiVersion: postgresql.cnpg.io/v1kind: Clustermetadata:  name: cnpg-cluster-restorespec:  instances: <number-of-instances>  bootstrap:    recovery:      source: source      recoveryTarget:        targetTime: "2023-10-01T12:00:00Z" # optional, if you want to restore to a specific point in time  externalClusters:  - name: source    plugin:      name: barman-cloud.cloudnative-pg.io      parameters:        barmanObjectName: s3-object-store-01        serverName: cnpg-cluster-1 # name of the source cluster
  #... other configurations ... besides the backup section
As you can see you need to configure the object store similarly as before in the new location, but don’t apply the backups.
This will create a new cluster named cnpg-cluster-restore and it will restore from the latest backup of the source cluster cnpg-cluster-1. The name must match the name of the source cluster in the backup configuration.
You will see a new pod being created and it will take some time to restore the data from the backup, you can check the status by seeing the logs of the pods. You can make it faster by increasing the maxParallel configuration in the object store configuration.
After this you can create a new object store, and then configure the backup section in the new cluster to start taking backups referring to the new object store.
6. Monitoring and Logging
Monitoring and logging are important for any database. CNPG provides some built-in metrics that you can use with Prometheus and Grafana. The configuration is very simple if you have Prometheus operator installed in your cluster. You can enable the metrics by adding the following configuration to the cluster manifest:
apiVersion: postgresql.cnpg.io/v1kind: Clustermetadata: name: cnpg-cluster-1 namespace: myappspec: #... other configurations ... monitoring: enablePodMonitor: trueThis will create a PodMonitor resource that Prometheus operator can use to scrape metrics from the Postgres pods. You can then create a Grafana dashboard to visualize the metrics, you can use this dashboard as it has many useful metrics for Postgres: https://grafana.com/grafana/dashboards/20417-cloudnativepg/
7. Adding More Databases on the Same Cluster
You can add more databases to the same cluster by using a resource called Database. Here is an example manifest to create a new database:
apiVersion: postgresql.cnpg.io/v1kind: Databasemetadata: name: app2-db namespace: myappspec: name: app2 owner: app cluster: name: cnpg-cluster-1This will share the resources of the same cluster, so it is more efficient than creating a new cluster for each database, but it also means that if the cluster goes down, all databases will be affected. So you should consider your use case and decide accordingly.
The backup will be taken for the whole cluster, so all databases will be backed up together and restored together without issue. But if you have different roles/owners it may have issues (maybe), please refer to the documentation for more details.
8. Modifying Configurations
Postgres has many configurations and you can modify them cluster-wide using the configuration section in the cluster manifest.
You should read this section of the documentation for more details: https://cloudnative-pg.io/documentation/current/postgresql_conf/#postgresql-configuration
Here is an example to change some common configurations:
apiVersion: postgresql.cnpg.io/v1kind: Clustermetadata:  name: cnpg-cluster-1  namespace: myappspec:
  #... other configurations ...
  postgresql:    parameters:      max_connections: "300" # postgres is not designed for high number of connections, so use a connection pooler like pgbouncer if you need more connections.      shared_buffers: "50GB" # 25-40% of RAM      wal_level: "logical" # read the documentation for more details.      effective_cache_size: "150GB" # 75% of RAM      maintenance_work_mem: "2GB" # for vacuum and index creation, default is much lower      min_wal_size: "2GB" # minimum size of WAL files. It's not the size of each segment, rather for wal file recycling      max_wal_size: "16GB" # maximum size of WAL files before a checkpoint is triggered, too big will increase crash recovery time.      random_page_cost: "1.2" # for planner heuristics (seq scan vs index scan), set lower for SSDs, higher for HDDs
The documentation also has list of common extensions installed by default, and how to install more if you need them. You should probably at least configure pg_stat_statements for query performance analysis for queries slower than expected.
9. Connection Pooling
You can read https://www.enterprisedb.com/postgres-tutorials/why-you-should-use-connection-pooling-when-setting-maxconnections-postgres. This will also hint at the max connection config previously mentioned.
For connection pooling, you can use pgbouncer that comes with CNPG, you have to create a manifest like this:
# Read-Write PgBouncer Pooler Configuration (on preferred master node)apiVersion: postgresql.cnpg.io/v1kind: Poolermetadata: name: cnpg-pooler-rw namespace: myappspec: cluster: name: cnpg-cluster-1 instances: 1 type: rw template: metadata: labels: app: cnpg-pooler-rw spec: containers: [] pgbouncer: poolMode: session parameters: max_client_conn: "1000" # Total client connections this pooler can accept default_pool_size: "200" # Connections to PostgreSQL per database (should be less than max_connection for administrative use)---# Read-Only PgBouncer Pooler Configuration (on other CNPG node)apiVersion: postgresql.cnpg.io/v1kind: Poolermetadata: name: cnpg-pooler-ro namespace: myappspec: cluster: name: cnpg-cluster-1 instances: 1 type: r template: metadata: labels: app: cnpg-pooler-ro spec: containers: [] pgbouncer: poolMode: session parameters: max_client_conn: "2000" # Higher for read queries, can handle more concurrent reads default_pool_size: "250" # More connections for read replicas since they handle more concurrent queriesThis will create two pgbouncer instances, one for read-write connections and one for read-only as example.
Connection pooling is useful for postgres as it is not designed for high number of connections, as each connection creates a process. So for choosing if to use pooler consider the following:
- If the number of instances is lower, just assign more connections per instance and use an application level pooler like HikariCP, this will allow you to take advantage of prepared statements and other optimizations.
- If you have many instances and they can scale up and down, then use pgbouncer, but set the pooling mode to transaction and make sure your application doesn’t depend on session level features like prepared statements, temp tables, etc as the connection will get passed between instances.
- If you are using session mode, I’m not sure why. It is useful if you have an application framework that doesn’t have a pooler library, or if you are using a language that doesn’t have a pooler library.
10. Expose the Database Outside the Cluster
You can expose the database outside the cluster using a LoadBalancer service or NodePort service, but it is kind of risky as it exposes the database to the internet. If you have to, you can expose the pooler-ro service as it is read-only, here is an example NodePort service manifest:
apiVersion: v1kind: Servicemetadata: name: cnpg-pooler-ro-nodeport namespace: myapp labels: app: cnpg-pooler-rospec: type: NodePort selector: app: cnpg-pooler-ro ports: - name: postgres port: 5432 targetPort: 5432 nodePort: 30432 protocol: TCPThis will create a NodePort service that exposes the pgbouncer-ro service on port 30432 on all nodes in the cluster. You can then connect to the database using the node’s IP address and the node port.
11. Failover and Maintenance
CNPG takes care of failover automatically, but here are some things that are useful to know:
Documentation: https://cloudnative-pg.io/documentation/1.20/failure_modes/
- If the primary instance goes down, one of the replicas will be promoted to primary automatically.
- You can also trigger a failover by using the plugin in the next section, or just by deleting the primary pod if you are brave enough.
- The instance is tied to the PVC, so if the node goes down, it will not create new instances on another node if you are using local storage. It also means when the node is back up it will recreate the instance on the same node.
- So if you are using local storage, and you want to migrate the instance to another node, you can delete the pod and delete its PVC, and it will create a new instance on another node, it will then sync from the primary’s backup. Make sure you backup first.
12. CNPG Plugin for kubectl
You can install this plugin and use it to manage the cluster more easily. The documentation is here https://cloudnative-pg.io/documentation/1.20/kubectl-plugin/.
You can install it using:
curl -sSfL \ https://github.com/cloudnative-pg/cloudnative-pg/raw/main/hack/install-cnpg-plugin.sh | \ sudo sh -s -- -b /usr/local/binYou can see the status of the cluster using:
kubectl cnpg status -n myapp cnpg-cluster-1There’s an issue in the plugin where the backup status is not shown, but the last backup in the grafana dashboard and cluster describe, also you can test restoring from the backup to verify it is working.
You can also run psql shell, run fio benchmarking, pgbench benchmarking, etc using the plugin that can be helpful for debugging and maintenance. You should read the documentation for more details.
13. Common PostgreSQL-Specific Features
Some common postgres specific features you can use that are not CNPG specific:
Unlogged Tables
For temporary data that doesn’t need to be persisted or that important, it is faster than regular tables as it doesn’t write to WAL. But the data is also not replicated to the slaves as they depend on WAL shipping. Good for temporarily bulk loading large data to process and put in other tables or like faster cache if your buffer size is huge.
https://www.postgresql.org/docs/current/sql-createtable.html#SQL-CREATETABLE-UNLOGGED
Partitioning
For large tables, it is useful to partition them to improve performance but make sure the tables are large, you have good key where queries are in the same partition and can prune other partitions.
JSONB
For semi-structured data, it is different from json data type, and it can actually parse and index the data.
https://www.postgresql.org/docs/current/datatype-json.html
Full Text Search
TSVector for text search, it is more powerful than using LIKE queries.
https://www.postgresql.org/docs/current/datatype-textsearch.html
Synchronous Commit
This is by default on, but you can turn it off for better performance if you can afford some data loss in case of crash. It is different from fsync off options, which can cause data corruption and you probably shouldn’t use. Making it off will make the commit return as soon as the data is written to the WAL buffer, but not flushed to disk. So in case of crash you can lose some transactions that are not flushed to disk, this can cause transaction to be lost but will cleanly rollback - client will think it’s committed but it is not in the database.
The max amount of transaction lost will be 3*wal_writer_delay, which is 200ms by default, so 600ms of transactions can be lost in case of crash worst case, but if any sync transaction is committed nothing will be lost. The good thing about this is it can be applied per session or per transaction, so you can use it for non-critical transactions.
This will not make all write actually asynchronous, only the commit to wal, so if your write latency is bottenecked by the more common max_wal_size, it will still block because WAL checkpointing will block you.
https://www.postgresql.org/docs/current/runtime-config-wal.html#GUC-SYNCHRONOUS-COMMIT